
If you own a business selling products, taking professional-looking pictures that connect with your customer and shine the spotlight on your product is so important. In fact, did you know that 93% of customers consider visual appearance to be a key deciding factor when it comes to purchasing a product?! So it’s not just important, it’s essential! And for that reason, I will share our top tips for creating better product pictures with you!
We live in an age where most of us walk around with a high-quality camera in our pocket every single day. Maybe using your phone is the only experience you have with photography, and if it is - don’t worry. Whatever your level of experience when it comes to product photography, this blog will help boost your confidence and knowledge. Whether you’re using a professional camera or just your smartphone, these tips will help you wow your audience with your product and generate sales. So let’s dive in!
Learn how to work with light
First, you have to learn how to use lighting to your advantage. And that starts with understanding the difference between natural and artificial light. Natural light is sunlight, also known as soft light. Artificial light, sometimes referred to as hard-light, includes light bulbs, candles, or even fire. To help you decide which set-up to go for, let the product that you're photographing, the purpose of the photo, and the platform you’re using to advertise lead the way for you.
Natural light is great for product photos that feature people, clothing, and food. This medium of lighting also works really well on social media platforms like Pinterest and Instagram, where authenticity is key. On the other hand, cookware, beauty products, artwork, and any product that features small details will be better presented with artificial light. If your product is being sold on a marketplace like Amazon, then artificial light would likely suit your product the best.
Working with artificial light can be difficult to get the hang of. The beauty is that you get complete control, yet learning how to use equipment like flashes, modifiers, and lighting stands can be tricky, not to mention expensive. By contrast, natural light is completely free and in abundance, so if you’re just starting out, we’d recommend starting there. You can shoot outdoors in the open, or inside near a window. Just make sure you shoot at the right time of day, when the sun is out but not blinding - typically early morning or late afternoon.
Consider compositions
You might be wondering ‘what is composition?’, so let me explain… Photo composition is how a photographer arranges the visual elements in their frame. In other words, what's in the rectangle? Many photography and art classes teach what is known as the rule of thirds which teaches people to visualize their frame as nine equal segments, exactly the same as gridlines on your smartphone camera.
The reason is that when looking at an image, people’s eyes tend to go to one of the points where the lines meet. This might counteract your natural urge to place your subject right in the middle of your frame, but trust me, fighting that urge will make for a much more interesting (and appealing) image.

Shoot from different angles
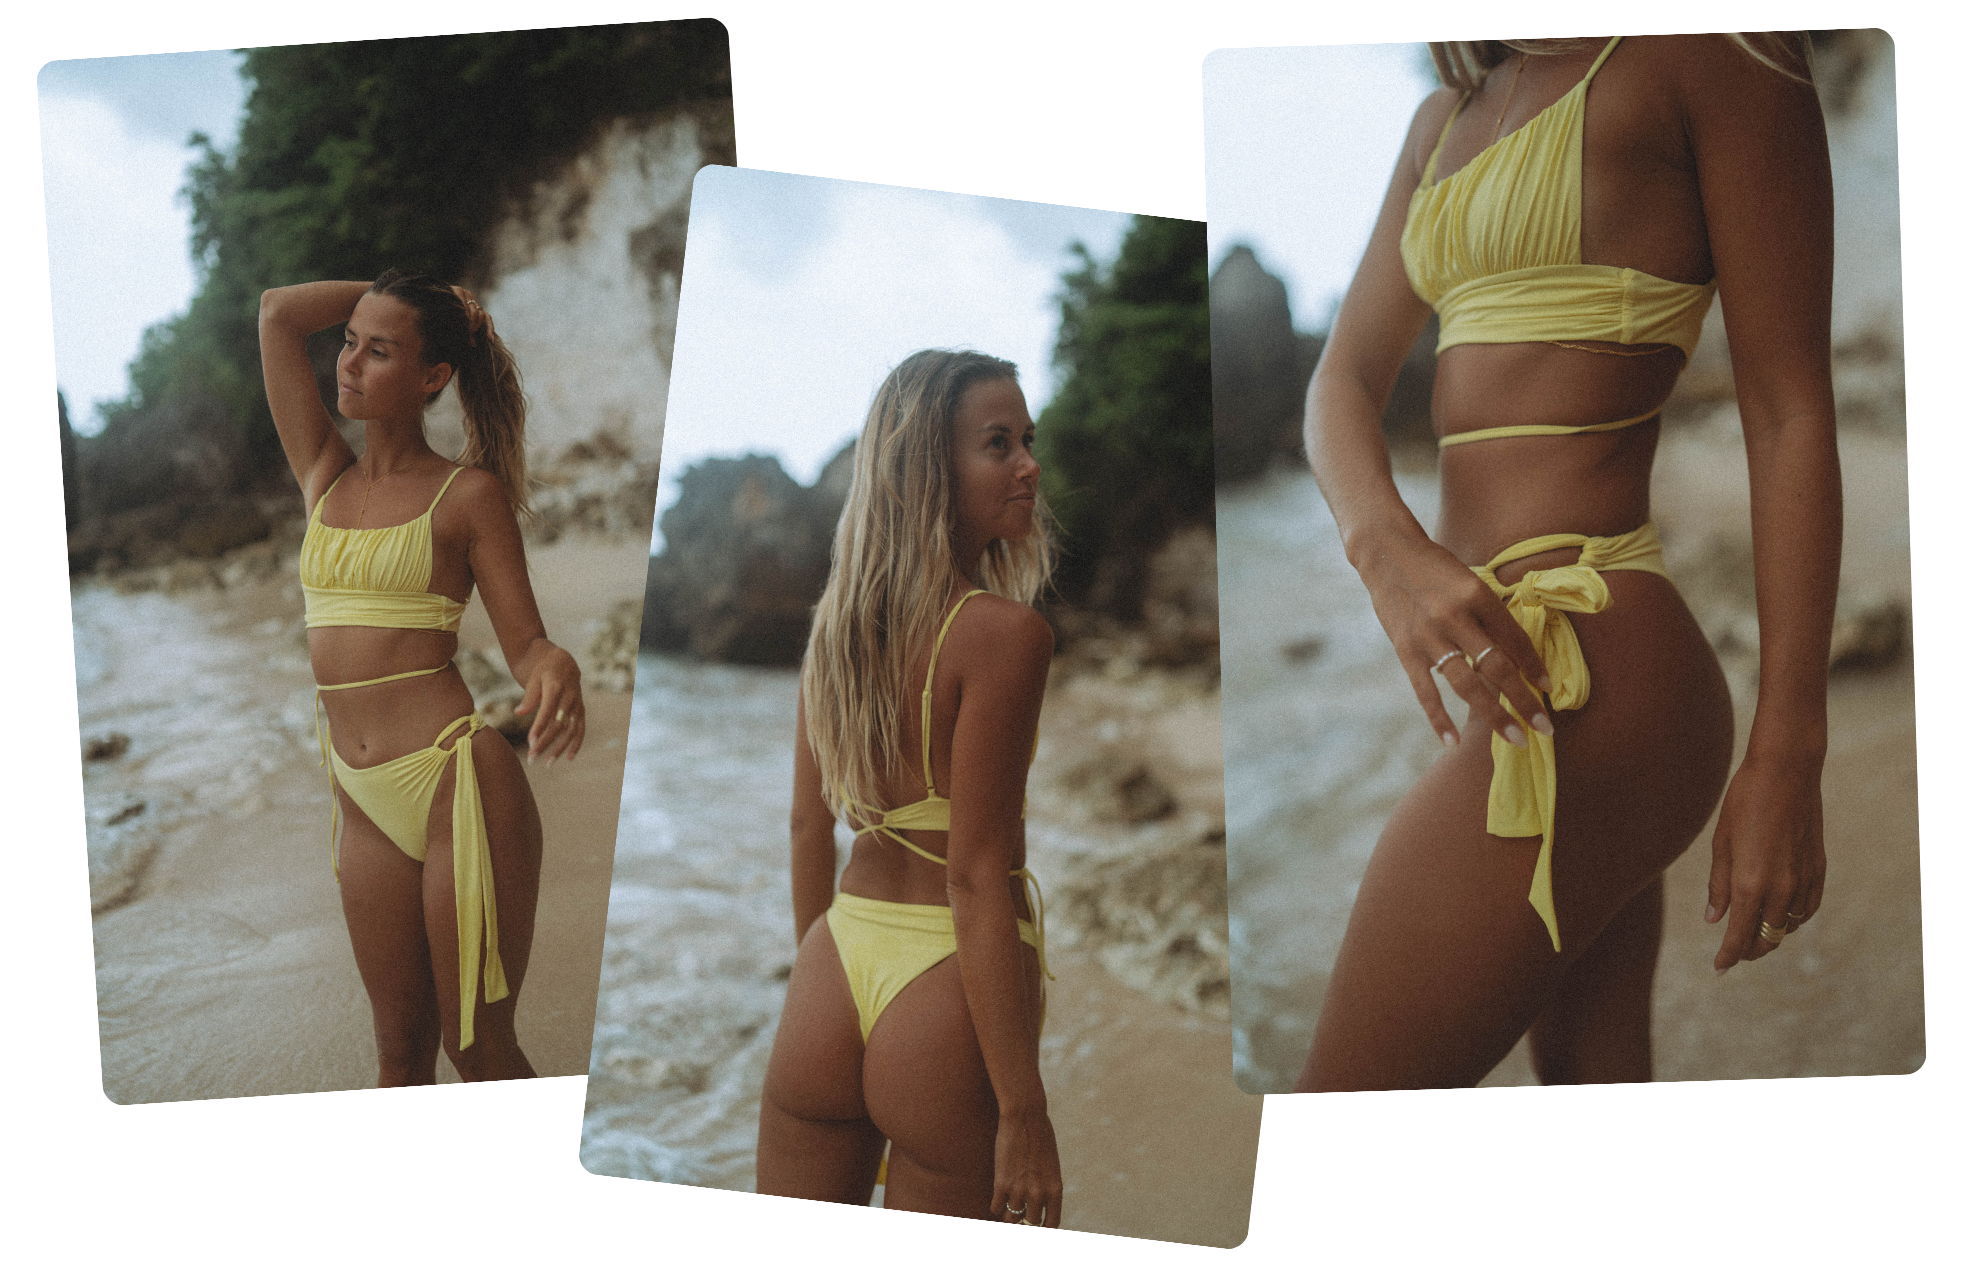
Remember, your ultimate goal here is to persuade people to buy your product. Trying to sell a physical product with a flat, digital image can be tricky - so give your audience a good view of what your product looks like. They’re going to want to see it from different angles so that they can imagine actually holding it and having it in front of them. Maybe you have a number of products you need to photograph - don't settle for a few shots of each product. Give yourself plenty of options and take multiple shots from various angles so you have a wide range to choose from when it comes to editing. This could also save you time and money in the long run as it could mean the difference between getting your product out there and starting selling or needing to re-shooting. Also, the better your customer knows what they will receive, the lower your risk of receiving returns!
For our fashion brand Mirah Maja for example, we try to show our pieces from every angle, front, side, and back:
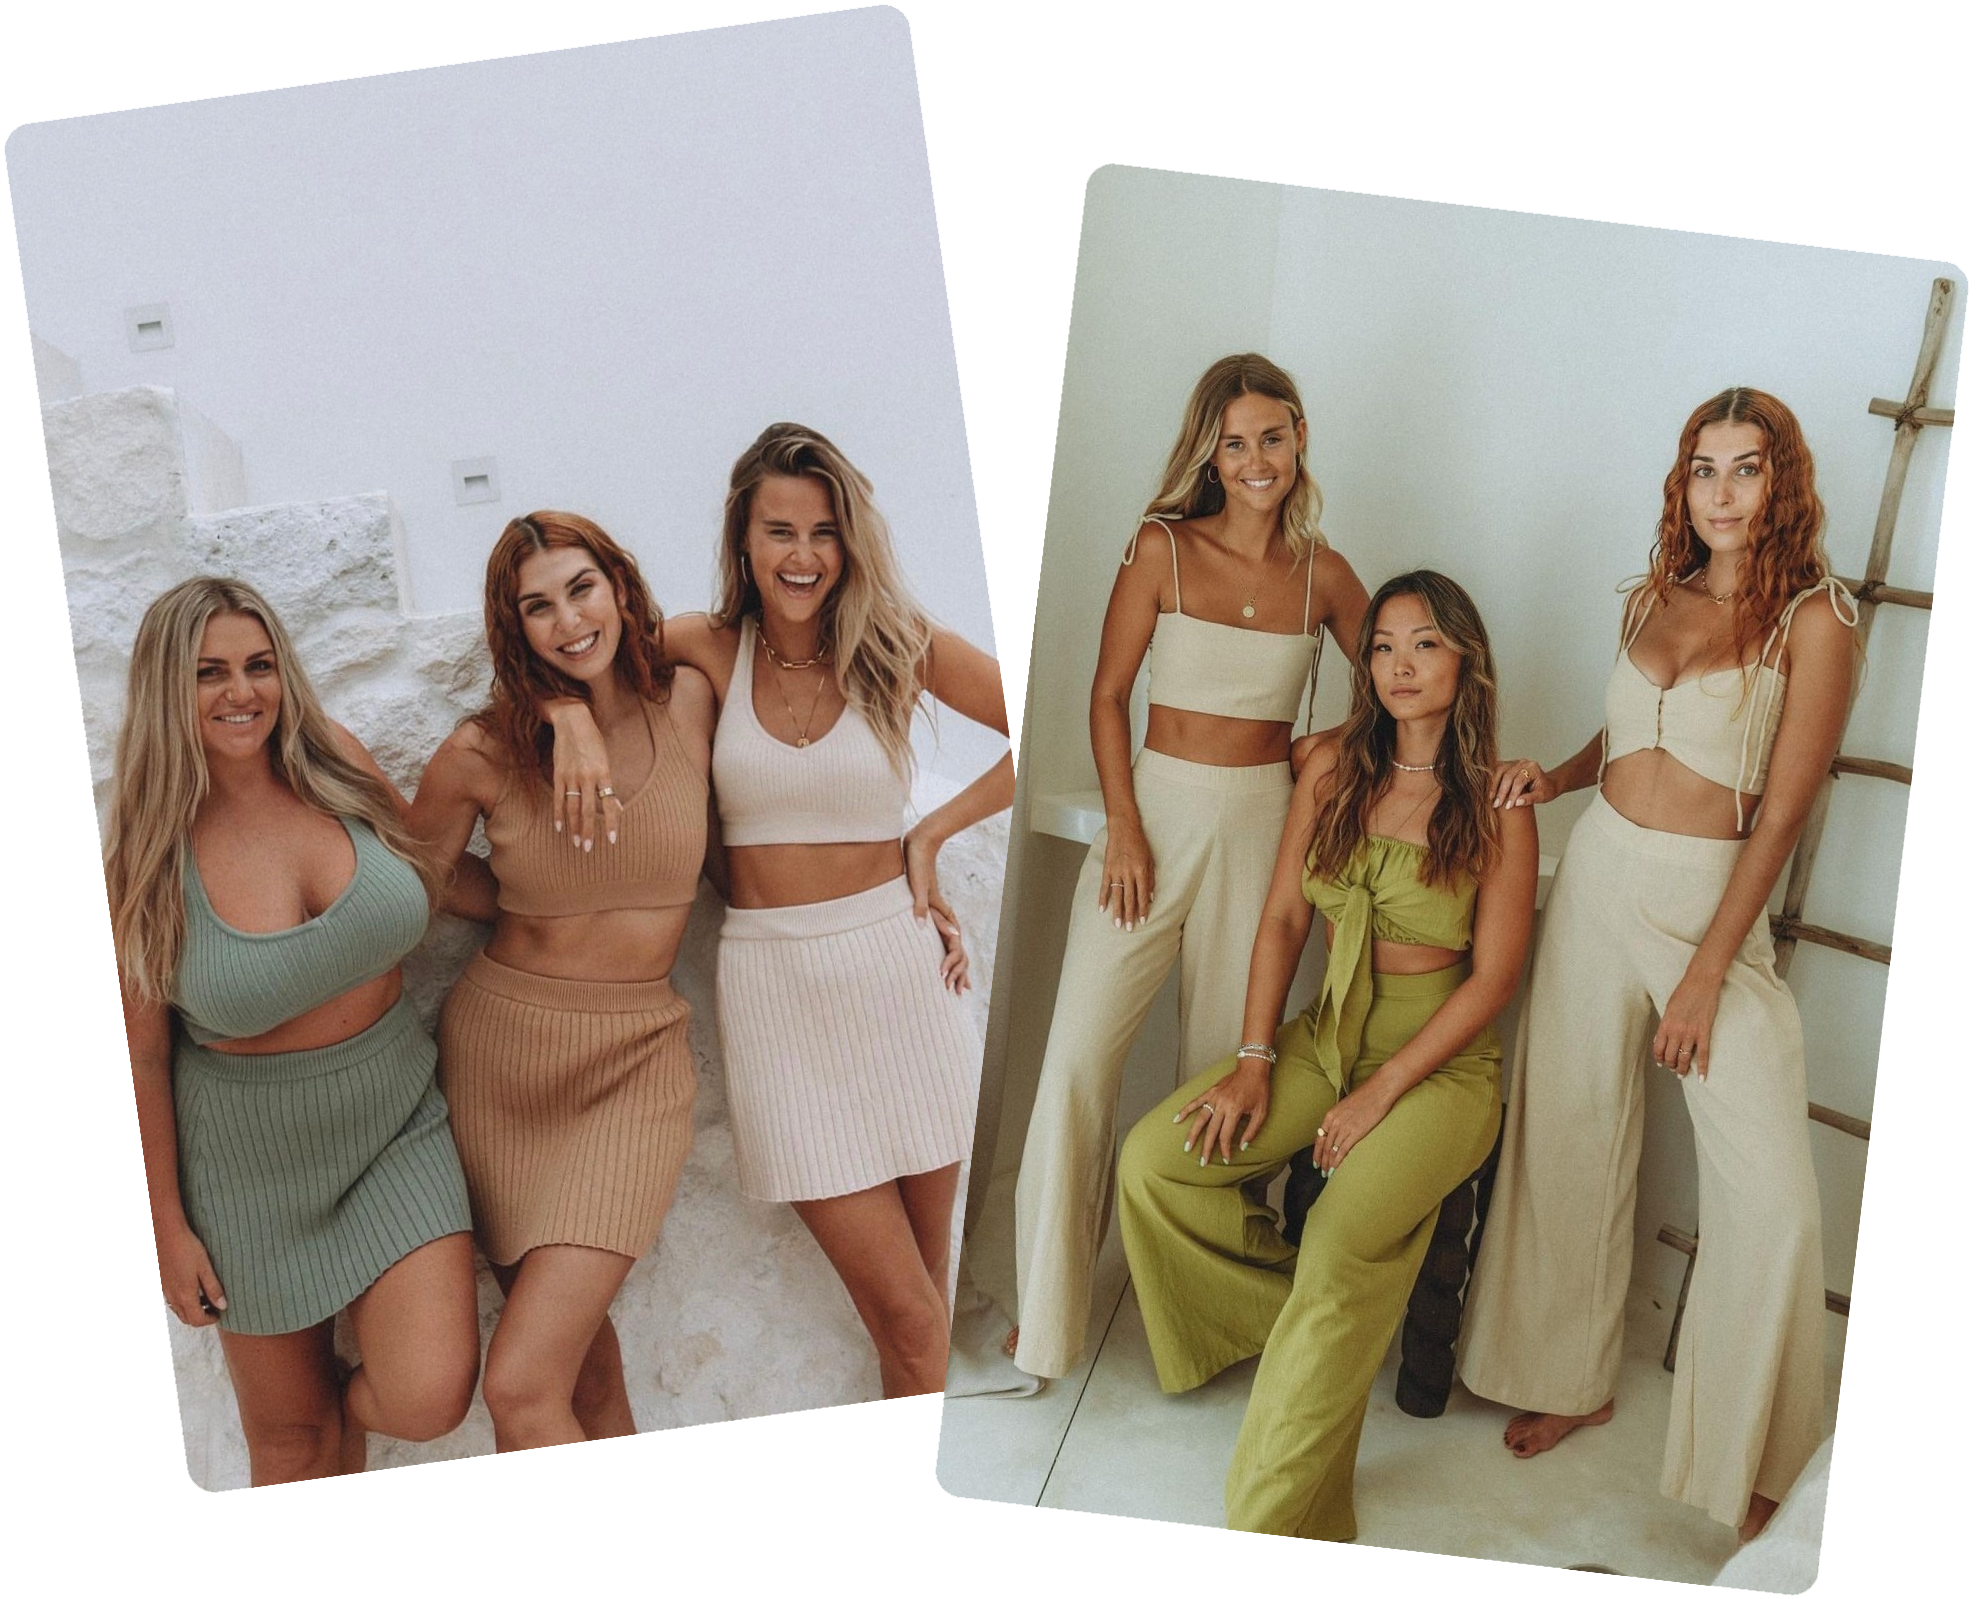
Use different models
Especially if you have a fashion brand, you will want to make sure that you display your pieces on different models with different body types, hair, and skin colors. Not only will this show that you are being inclusive, but your customers will be able to find someone they can identify with - they will be able to get an idea of what the pieces will look like on them.
Add depth without distracting
When you are taking product photos you will realize how easy it is for backgrounds to steal the focus of your product, distracting the viewer and making it unclear as to what it is you’re actually selling. This is especially true if you are shooting in real-life scenarios and not using a backdrop. Portrait mode will put the emphasis on your product, while still showing a background and creating the kind of depth that a plain sheet or wall cannot. Portrait blurs the background while keeping the product super sharp, which will help give your product image context and convey your message clearly to your audience. You will find this setting on most professional cameras and many of the smartphones released in the past few years.
Choose the right backdrop
If you prefer not to blur out your background, you can also use a backdrop - but choosing the right backdrop for your product during a shoot is crucial. Always remember that your backdrop must suit the product without taking anything away from the product itself.
One way to avoid this common pitfall is to keep your background plain and simple as this will ensure your product won’t get lost in the photograph - but conversely, you don’t want your images to be boring. So get creative! For example, if you own a natural skincare brand, could your backdrop be out in nature, against rocks or leaves? If you want to add more interest to a white background, experiment with textures, such as using a white linen sheet. Here are some examples of different backdrops that we used for Mirah Maja - as you can see, non of them take away the focus from our actual product:

Tip: It’s important to note that for product listings on Amazon, it’s a requirement to use a plain white background to showcase your product. For Google Shopping Ads, it is not a rule but it is considered best practice and works effectively. Our recommendation is to have a whole host of image types to share with your audience so they can really get a feel for your product.
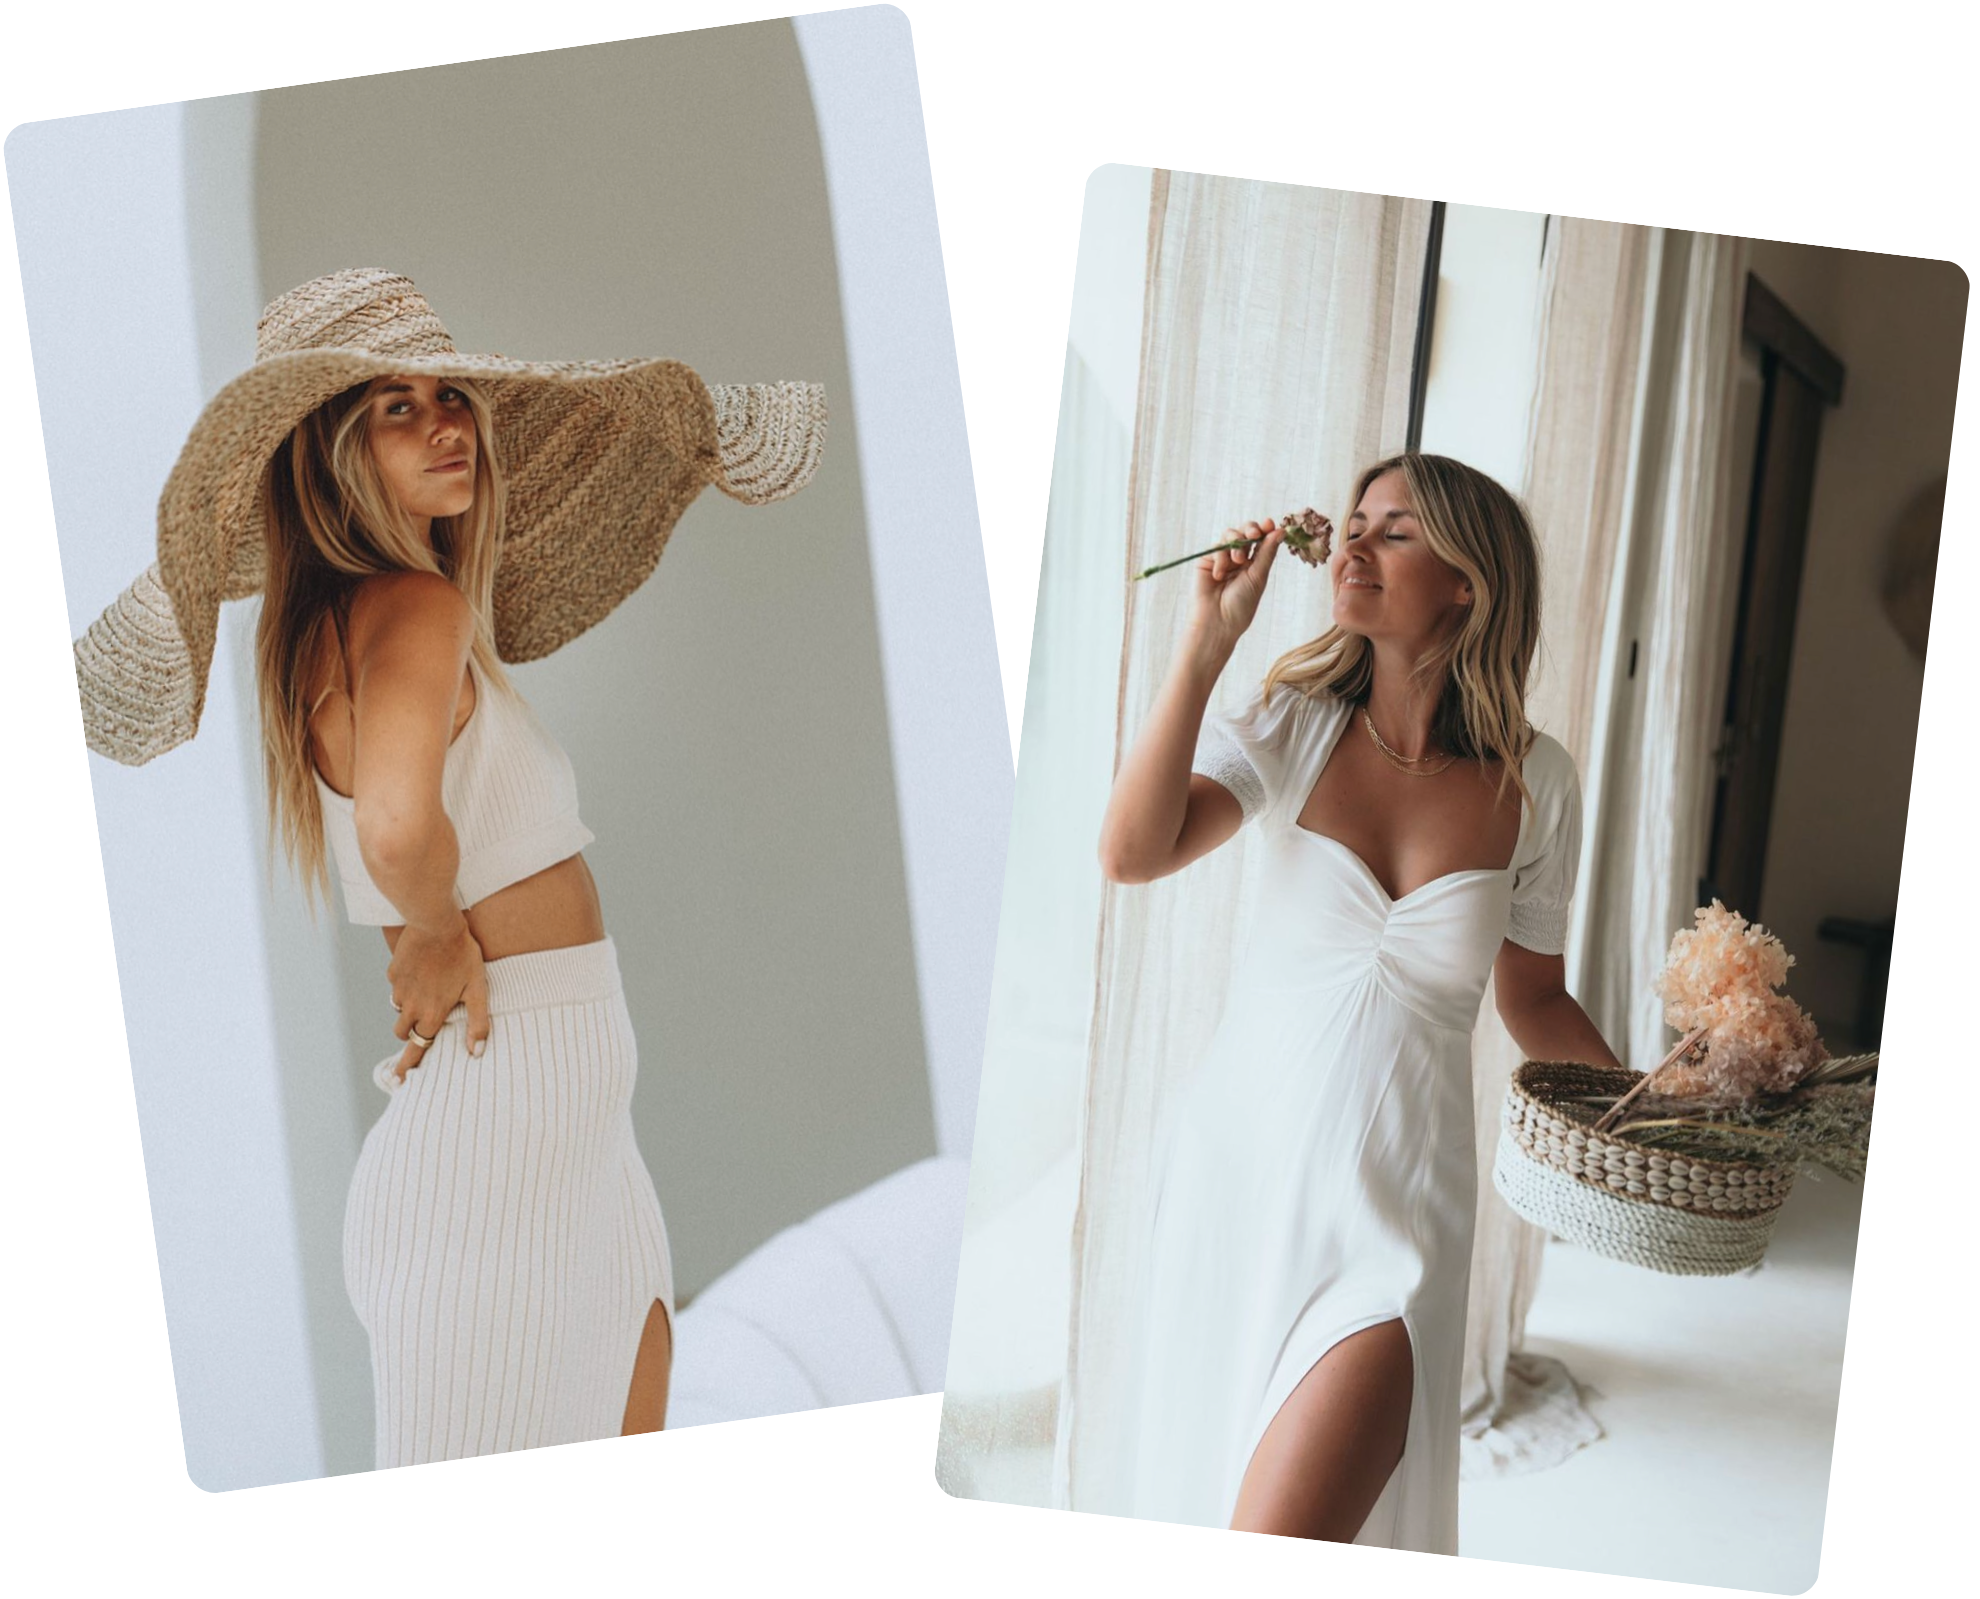
Tap into the power of props
Another way to add a story to your images is through props - but again, you need to be careful not to distract attention away from your product. When using props, it’s best to keep them simple, relevant, and aesthetically appropriate. By that, I mean that your props must tie into the overall look and feel you are trying to achieve with your product images. So spend some time thinking about what you want to convey - the different meanings or feelings.
For example, to get a sense of luxury, you might use silks or metallic ornaments. If your brand is natural or has a strong affiliation with the outdoors, you might shoot with shells, wood, or other natural elements. Experiment with different props to find what works, all while remembering to put more emphasis on product over props. For our Mirah Maja shoot, for example, we used flowers, plants, big hats, and other things that have this simple and natural look that we are going for:
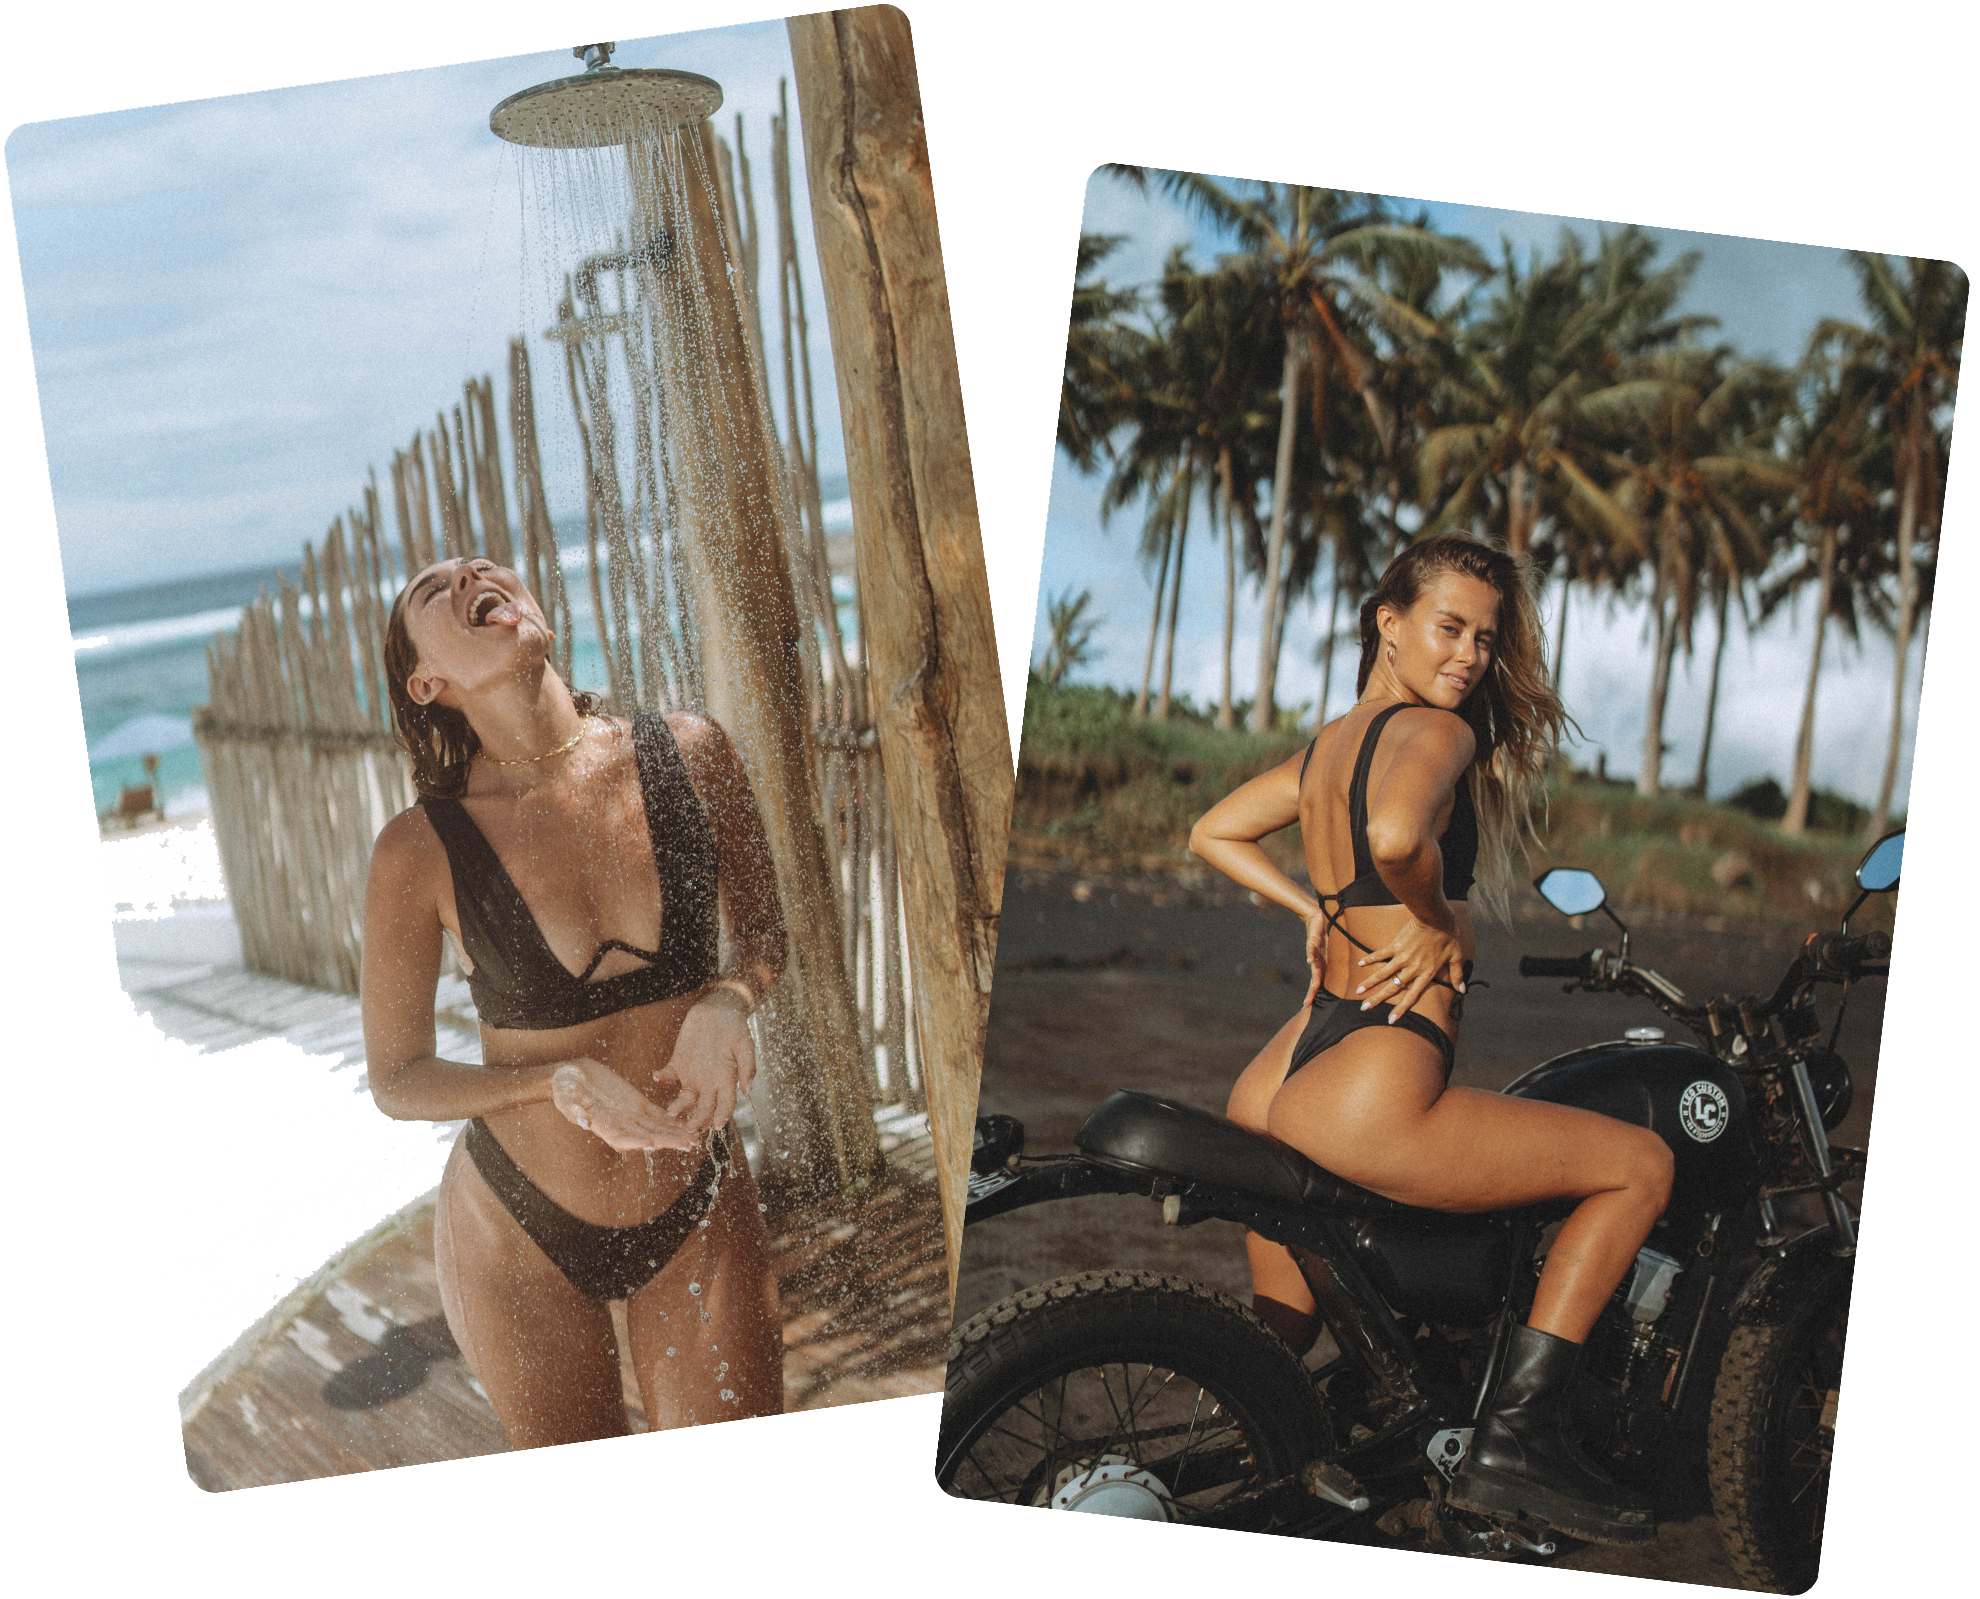
Put your product in context
Always refer back to your goal: sales. Put yourself into the mind of the customer and ask yourself what you would want to see if you were considering buying this product. And remember, the more you can show them, the more likely they will be able to envision themselves using the product you’re selling. It’s important that along with artistic images that tap sell the transformation (how your product can make them feel), you also show them exactly how it will be used. For that, you need to shoot your product in context.
People will find it difficult to see themselves using a product that is completely removed from its context. For example, someone looking to buy some new outfits for the summer will find it easier to see themselves in the clothes if they are worn by a model rather than them being hung against a blank background. These types of photos are called lifestyle photos and it's when you style your content in a real-life environment that your product would be used in.
So let's say you sell sunglasses or jewelry or even skincare products - instead of posting boring pictures in front of a white wall or on a stand, use models and props and put your content into "a scene". If you’re shooting homeware, you could show them on a decorated kitchen aisle. For bikinis and swimwear, you might take your photoshoots at the beach. Allow your audience and potential customers to really see how and where they would use your product because that's what’s going to nudge them towards buying.
Don’t forget about videos
Another great way to show your product from every angle and in action is through videos! Show your product from every side, zoom in and out, show all the details, the material etc. Ultimately, videos can lead to a greater sense of trust, as you won’t be able to hide anything behind good angles or lighting.
If you have a fashion brand, a video will allow your viewer to get an idea of how the pieces look in motion. If you have any other type of product, you could demonstrate how to use or apply your product, or the results you get from using them.
Don’t skip the editing process
Let's talk about the editing process. Love it or hate it, it’s essential if you want to make your images stand out from the sea of other product photos all over the internet. Personally, editing is one of my favorite parts of the photography process as this is where you really get to add the wow factor to your images. Bear in mind that when taking photos of products, editing should be used only to subtly enhance your photos, not change the entire image beyond recognition. (You don’t want to get accused of false advertising, after all!) One of our go-to photo editing softwares is Lightroom which can be used on both desktop and downloaded as an app for your phone, offering a wide range of filters, auto-corrections and is also very user-friendly once you get over the initial learning curve. If you’re looking for a few quick and very useful tips to help you along the way with photo editing, check out this video we made on how we edit on Lightroom. Also, if you like to give your images a vintage-cinematic look, we have the right presets for you: our CLD Presets - and they’re on sale right now!
I really hope these tips help you take incredible photos that make your products shine. Once you are ready to create your product photos, don’t forget to plan your photoshoot beforehand to ensure that everything goes as planned!
Happy snapping!


